Planning a Budget-Friendly Family Trip to Yosemite National Park
Yosemite National Park is a place of undeniable majesty, with towering granite cliffs, ancient giant sequoias, and roaring waterfalls that capture the imagination of every visitor, especially kids. It’s a dream destination for many families, offering endless opportunities for outdoor adventure and memory-making. However, the perception that a trip to such an iconic national park must be expensive often deters families from planning their visit. We’re here to tell you that enjoying the splendor of Yosemite with your children doesn’t have to break the bank.
Just like planning a trip to visiting Grand Canyon on a budget or Zion National Park on a budget, a little strategic planning can go a long way in Yosemite. This guide is packed with practical tips and insider advice to help you experience all the wonders of Yosemite National Park without overspending. From understanding entrance fees to finding affordable lodging and enjoying free activities, we’ll cover everything you need to know. Our goal is to empower you to plan an unforgettable family adventure, proving that planning a family vacation to Zion National Park or Yosemite on a budget is not only possible but incredibly rewarding. Get ready to explore Yosemite’s beauty and create lasting memories with your kids, all while keeping a watchful eye on your travel expenses.
Filter out the noise and find what works for your family.
Every resort we review gets one of four Family Fit ratings. The rating is based on kids programming, amenities, vibe, and who the resort actually markets to - not just whether they allow children.
Discover My Ideal Resort →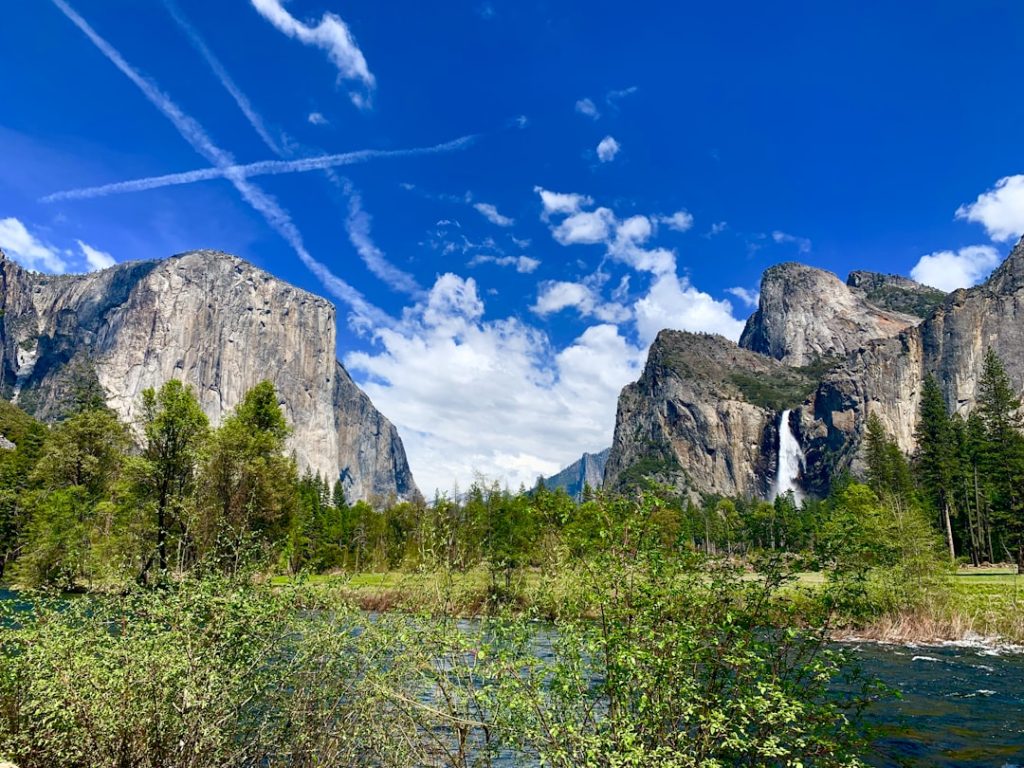
Understanding Entrance Fees & the “America the Beautiful” Pass
One of the first costs you’ll encounter when planning your Yosemite trip is the entrance fee. Knowing your options here can significantly impact your overall budget. For most families, the standard entrance fee covers one non-commercial vehicle and all its passengers for seven days. This means if you arrive in a family car, you pay one flat rate, regardless of how many people are inside. This is a great value, especially for larger families, allowing you to explore the park over an entire week without additional entry charges.
Current Fees, the 4th Grade “Every Kid Outdoors” Pass, and Free Entrance Days for 2026
The standard entrance fee for Yosemite National Park typically allows for a seven-day entry for a single vehicle. As of our last check, this fee is designed to cover your car and everyone in it, making it straightforward for family trips. You can also purchase individual passes for those entering on foot or bicycle, or a motorcycle pass, but the vehicle pass is usually the most economical for families.
For families who love exploring multiple national parks, the “America the Beautiful” National Parks and Federal Recreational Lands Pass is an absolute game-changer. This annual pass covers entrance fees at all national parks and national wildlife refuges, as well as standard amenity fees at national forests and grasslands, and at lands managed by the Bureau of Land Management, Bureau of Reclamation, and U.S. Army Corps of Engineers. If your family plans on visiting Yellowstone National Park or other federal recreation sites within a 12-month period, this pass quickly pays for itself. It typically costs around $80 and is valid for one year from the month of purchase, admitting the pass holder and passengers in a single, private non-commercial vehicle.
Do you have a fourth grader in your family? Then you’re in luck! The “Every Kid Outdoors” program provides a free pass to all fourth graders and their families for an entire year. This incredible initiative allows families with a 4th grader to access all national parks, forests, lands, and waters free of charge. You simply need to visit the Every Kid Outdoors website, follow the steps to obtain a voucher, and then exchange it for a pass at any federal recreation site that issues passes. It’s a fantastic way for kids to learn about conservation and explore the country’s natural wonders, making family vacation adventures even more accessible.
Another excellent way to save on entrance fees is to plan your visit around one of the National Park Service’s annual free entrance days. While the exact dates for 2026 are typically announced by the NPS closer to the year, these days usually commemorate significant events or holidays. Historically, free entrance days have included dates like Martin Luther King, Jr.’s birthday, the first day of National Park Week, the anniversary of the Great American Outdoors Act, National Public Lands Day, and Veterans Day. Always check the official NPS website for Yosemite National Park as your travel date approaches to confirm these dates and potentially save on your entry fee.
Where to Find Affordable Family Lodging
Accommodation is often one of the biggest expenses when planning a family trip, and Yosemite is no exception. However, with a bit of foresight and flexibility, you can find options that are friendly to your budget. Your two main choices boil down to staying inside the park at a campground or opting for more budget-friendly hotels in the surrounding gateway towns. Both have their pros and cons, especially when traveling with children.
Best Value Campgrounds vs. Budget Hotels in Gateway Towns
Camping Within Yosemite National Park:
Camping is undoubtedly the best value for families visiting Yosemite, offering an immersive experience amidst nature. There’s nothing quite like waking up to the sounds of the wilderness and stepping out of your tent to breathtaking views of granite giants. Yosemite boasts several excellent campgrounds, many of which are very family-friendly. In Yosemite Valley, popular spots like Upper Pines, Lower Pines, and North Pines offer proximity to major attractions and amenities. However, these are incredibly competitive and require reservations up to five months in advance, often booking up within minutes of becoming available. Securing a spot in one of these can feel like winning the lottery, but the payoff is immense: unparalleled access to the valley at a fraction of the cost of other lodging options.
- Upper Pines, Lower Pines, North Pines: Located directly in Yosemite Valley, offering unbeatable access to attractions. Reservations are crucial and must be made months ahead.
- Hodgdon Meadow: Situated near the Big Oak Flat entrance, a bit further from the Valley but still a great base.
- Tuolumne Meadows Campground: Open seasonally (usually summer), this high-country campground offers a different Yosemite experience with access to stunning subalpine meadows and lakes.
- Amenities: Most campgrounds offer picnic tables, fire rings, and shared restrooms with potable water. Crucially, all require proper food storage in bear-proof lockers (bear boxes) to protect both your food and wildlife.
Beyond the Valley, campgrounds like Hodgdon Meadow (near the Big Oak Flat entrance) and Tuolumne Meadows (seasonal, in the high country) offer excellent alternatives. These tend to be a little easier to book but still require advance planning. Remember, camping often means bringing your own gear, which is another cost factor to consider, though we’ll cover gear savings later.
Budget Hotels in Gateway Towns:
If camping isn’t your family’s style, or if you couldn’t secure a reservation, gateway towns offer a range of hotels, some of which are more budget-friendly than in-park lodges. These towns act as excellent staging points for your Yosemite adventures, much like Grand Canyon family gateway towns or Zion family gateway towns. The trade-off is the daily commute into the park, which can range from 30 minutes to over an hour, depending on the town and your specific destination within Yosemite.
- Mariposa: Located southwest of the park, Mariposa is a charming historic town with several motel and hotel options, often at more competitive prices. It’s about an hour’s drive to Yosemite Valley.
- Oakhurst: To the south, Oakhurst is a larger town with more amenities, including bigger grocery stores and a wider selection of budget hotels and chain motels. It’s approximately 1.5 hours to Yosemite Valley.
- Groveland: West of the park, near the Big Oak Flat entrance, Groveland offers a quaint, historic feel. Lodging here can be a good option for quicker access to the northern parts of the park, though it’s still about an hour to the Valley.
- El Portal: The closest gateway town, located just outside the park’s Arch Rock entrance. While it has fewer budget options, the proximity is a huge advantage, cutting down on drive time significantly.
Booking in advance is absolutely essential, especially if you’re traveling during peak season (spring, summer, and fall weekends). Rates will be highest during these times, so try to secure your lodging as early as possible to lock in better prices. Many hotels offer amenities like swimming pools, which can be a welcome treat for kids after a long day of exploring Yosemite, making the drive a little more worthwhile.
Eating on a Budget: Picnic Spots & Grocery Runs
Food costs can quickly add up on any family vacation, and a trip to Yosemite is no exception. Park restaurants and cafes, while convenient, are typically pricier than preparing your own meals. The good news is that Yosemite is a fantastic place for picnics, with countless scenic spots perfect for a meal surrounded by nature. Planning your meals and making grocery runs are two of the most effective ways to significantly reduce your budget when visiting Yosemite National Park on a budget.
Best Nearby Grocery Stores and the Most Scenic (Free) Picnic Areas in the Park
Stocking Up at Grocery Stores:
The key to eating on a budget is to arrive at the park well-stocked. While there are a few general stores inside Yosemite, their selections are limited and prices are inflated. Your best bet is to do a major grocery run in one of the gateway towns before you enter the park. These larger stores will have a wider variety of fresh produce, snacks, and meal ingredients at standard supermarket prices.
- Mariposa: Pioneer Market is a solid choice in Mariposa. It has a good selection of groceries, including fresh produce and deli items, perfect for packing sandwiches and salads.
- Oakhurst: As a larger town, Oakhurst offers more options, including a Vons and a Raley’s. These full-service supermarkets are ideal for stocking up on everything you’ll need for several days, from breakfast cereals to dinner ingredients.
- Groveland: Groveland Provisions offers a smaller, but often well-curated selection of groceries and specialty items, suitable for last-minute needs or specific dietary requirements.
- Inside the Park: The Yosemite Valley Store and Tuolumne Meadows Store (seasonal) offer basic supplies, snacks, and some ready-to-eat items, but they should be considered for emergencies or small top-ups rather than major grocery hauls. Prices will be higher, so planning ahead with supplies from outside the park is highly recommended.
Remember to bring a large cooler (or two!) to keep perishables fresh, especially during warmer months. Packing reusable water bottles is also essential, as you can refill them at various potable water stations throughout the park, saving money on bottled drinks and reducing waste.
Scenic (Free) Picnic Areas in Yosemite:
Yosemite is dotted with incredible picnic spots, each offering its own unique view and atmosphere. The best part? Enjoying these views with your packed lunch is completely free! Many picnic areas provide tables, restrooms, and crucial bear-proof food storage lockers. Always use these lockers to secure all food, scented items, and even empty coolers, even if you’re just stepping away for a moment. This is vital for the safety of both visitors and the park’s bear population.
- Yosemite Valley Picnic Spots:
- Sentinel Beach Picnic Area: Located along the Merced River, this spot offers stunning views of Yosemite Falls and Sentinel Rock. It’s a wonderful place to relax by the water’s edge, and kids will love the opportunity to dip their toes in the river on a warm day.
- El Capitan Meadow: Spread out a blanket here for an unparalleled view of El Capitan, one of the world’s most famous rock formations. It’s also a prime spot for watching climbers ascend its sheer face. This open meadow is perfect for kids to run around while you soak in the grandeur.
- Cathedral Beach Picnic Area: Another beautiful riverside location, offering excellent views of El Capitan and Bridalveil Fall. It’s often less crowded than Sentinel Beach, providing a more tranquil setting for your family meal.
- Beyond Yosemite Valley:
- Tenaya Lake (Tuolumne Meadows): If you venture into the high country (typically accessible in summer), Tenaya Lake offers breathtaking views of granite domes reflecting in crystal-clear waters. There are picnic tables right by the lake, providing an idyllic setting for a family lunch amidst alpine beauty.
- Glacier Point (Views, but often crowded): While not a traditional picnic area with many tables, the views from Glacier Point are legendary. You can find small spots to enjoy a quick bite while gazing at Half Dome, Yosemite Valley, and the High Sierra. Be prepared for crowds, especially during peak hours.
Packing your own meals not only saves money but also gives your family the flexibility to eat whenever and wherever hunger strikes, allowing for more spontaneous and memorable experiences while visiting Yosemite National Park on a budget.
Top Free Things to Do with Kids in Yosemite National Park
Yosemite National Park is a natural playground, and many of its most awe-inspiring experiences come without a price tag. Beyond the entrance fee, you’ll find a wealth of activities that engage children of all ages, fostering a love for nature and creating indelible family memories. These high-value activities are perfect for any family planning family vacation adventures without requiring extra permits or tour fees.
High-Value Activities That Don’t Require Extra Permits or Tour Fees
1. Hiking Easy Trails:
Yosemite offers an abundance of trails suitable for little legs and strollers, ensuring everyone can experience the park’s beauty up close.
- Lower Yosemite Fall Trail: This paved, accessible loop is perfect for families with strollers or very young children. It leads to the base of Lower Yosemite Fall, where you can feel the mist on your face, especially powerful in spring and early summer. The views are incredible, and it’s a relatively short walk, making it ideal for a quick, impactful experience.
- Cook’s Meadow Loop: Offering some of the most iconic postcard views of Yosemite Valley, this flat, easy loop meanders through open meadows. Kids can spot deer grazing while parents capture stunning photographs of Half Dome, Yosemite Falls, and Sentinel Rock. It’s a gentle stroll that provides a grand sense of the valley’s scale.
- Mirror Lake Trail: A mostly flat trail that leads to the seasonal Mirror Lake. When the water levels are high (typically in spring), the lake offers stunning reflections of Half Dome and other cliffs, creating magical photo opportunities. It’s a peaceful walk, perfect for a quiet family outing. Much like the best family-friendly hikes in Grand Canyon National Park, these trails prioritize accessibility and natural beauty.
2. Junior Ranger Program:
This award-winning program is a fantastic way to engage kids (typically ages 5-13) in learning about the park. Pick up a free activity booklet at any visitor center, and kids can complete a series of fun and educational tasks related to Yosemite’s natural and cultural history. Upon completion, they return to a ranger to receive a Junior Ranger badge and take an oath, a proud moment for any young explorer. It encourages observation, critical thinking, and a deeper connection to the park, making it a highlight for many children.
3. Stargazing:
Far from city lights, Yosemite’s night skies are a spectacular display of stars, constellations, and the Milky Way. On clear nights, simply step out into an open area like El Capitan Meadow or a campground clearing, lay down a blanket, and look up. The sheer number of stars is often a mesmerizing and humbling experience for both kids and adults. Bring a flashlight with a red-light setting to preserve night vision, and maybe a star chart to identify constellations. It’s a truly magical and entirely free experience.
4. Valley Floor Loop (Walk or Partial Walk):
While full bike rentals are an option, walking portions of the Valley Floor Loop is a wonderful free activity. This extensive loop offers varying perspectives of Yosemite’s famous landmarks, including El Capitan, Bridalveil Fall, and the Merced River. Families can choose shorter sections to walk, enjoying the scenery at their own pace. It’s a great way to cover a lot of ground and soak in the grandeur of the valley without any cost other than your own two feet.
5. Visitor Centers & Museums:
Yosemite’s visitor centers and museums offer enriching experiences, especially on a rainy day or when you need a break from hiking.
- Yosemite Valley Visitor Center: Features engaging exhibits on the park’s geology, wildlife, and history, along with informative films. Rangers are often on hand to answer questions and provide up-to-date park information.
- Ansel Adams Gallery: Free to browse, this gallery showcases the iconic photography of Ansel Adams and other contemporary artists. It’s an inspiring stop that highlights the artistic beauty of Yosemite.
- Yosemite Museum: Located in Yosemite Village, this museum focuses on the cultural history of the Ahwahneechee people, the park’s original inhabitants. It features traditional baskets, tools, and provides insight into the area’s rich heritage.
6. Wildlife Viewing:
Yosemite is home to diverse wildlife, and spotting animals in their natural habitat is always a thrill for kids. Keep an eye out for mule deer grazing in meadows, various bird species flitting through trees, and maybe even a coyote or black bear from a safe distance. Remember to always maintain a respectful distance, never feed wildlife, and store all food properly to prevent human-animal encounters. These encounters are exciting and provide real-world lessons in ecology and respect for nature, enriching your experience of visiting Yosemite National Park on a budget.
How to Save on Gear & Equipment
Equipping your family for a trip to a national park like Yosemite can seem daunting, especially if you’re new to outdoor adventures. However, there are many clever ways to save on gear and equipment, ensuring you have what you need without overspending. The key is to differentiate between “must-haves” for safety and comfort, and “nice-to-haves” that can enhance the experience but aren’t strictly necessary for visiting Grand Canyon on a budget, or any other park.
Rental vs. Buying, and “Must-haves” vs. “Nice-to-haves”
Rental vs. Buying:
Deciding whether to rent or buy depends largely on how often you anticipate using specific items. For a one-off trip or if you’re just starting to explore the outdoors, renting can be a cost-effective solution for specialized gear.
- Renting: Consider renting items like child carrier backpacks, which can be expensive to buy new and are only needed for a specific age range. In winter, snowshoes or cross-country skis can also be rented in Yosemite Valley or nearby gateway towns. Bike rentals are available within Yosemite Valley, offering a fun way to explore flat trails without the commitment of purchasing bikes for the whole family. Check with local outfitters in towns like Oakhurst or Mariposa, or inside the park at the Yosemite Valley Lodge Tour and Activity Desk for rental options.
- Buying: If you’re an avid adventurer or plan many national park trips, investing in durable, versatile gear makes sense. Look for sales, end-of-season clearances, or consider buying gently used gear from outdoor consignment shops, REI Used Gear, or online marketplaces. This can significantly reduce the cost of quality items that will last for years.
“Must-haves” vs. “Nice-to-haves”:
Prioritizing your gear list is essential for staying on budget and avoiding unnecessary purchases. Focus on items that are critical for safety, comfort, and the overall enjoyment of your trip.
Must-haves:
These are the non-negotiables that ensure your family’s safety and comfort while exploring Yosemite.
- Good Hiking Shoes: Proper footwear is paramount for preventing blisters and providing support on trails. Ensure everyone has comfortable, broken-in shoes with good traction. For kids, consider options like the best hiking shoes for kids which offer durability and support. If you anticipate wet conditions or stream crossings, best kids waterproof trail shoes can be a lifesaver.
- Layers of Clothing: Yosemite’s weather can change rapidly, even within a single day. Pack moisture-wicking base layers, insulating mid-layers (fleece or puffy jacket), and a waterproof/windproof outer shell for everyone. This allows for easy adjustments to temperature fluctuations.
- Water Bottles/Hydration Packs: Dehydration is a real risk. Each family member should have their own reusable water bottle or hydration pack. There are many potable water refill stations throughout the park.
- First-Aid Kit: A basic first-aid kit with bandages, antiseptic wipes, pain relievers, blister treatment, and any personal medications is essential for minor scrapes and ailments.
- Sun Protection: The sun in Yosemite can be intense, especially at higher elevations. Pack sunscreen (SPF 30+), wide-brimmed hats, and sunglasses for everyone.
- Insect Repellent: Mosquitoes and other biting insects can be present, especially near water sources or during certain times of the year.
- Bear-Safe Food Storage: If camping or picnicking, you MUST use bear-resistant food lockers (provided at campgrounds and picnic areas) for all food, scented items (toiletries), and even empty coolers. Understanding bear safety is critical in Yosemite; never feed bears and keep a clean campsite.
Nice-to-haves:
These items can enhance your experience but aren’t strictly necessary, making them good candidates to borrow, skip, or buy secondhand if your budget allows.
- Binoculars: Great for spotting distant wildlife or getting a closer look at the intricate details of distant rock formations.
- Trekking Poles: Can provide extra stability and reduce strain on knees, especially on longer or steeper hikes, but many hikers do without them.
- Camera: While smartphones take great photos, a dedicated camera can offer higher quality, but it’s not essential for capturing memories.
- Headlamps/Flashlights: Useful for navigating campsites after dark or for early morning starts, but a phone flashlight can suffice for quick needs.
- Camp Chairs: While comfortable for relaxing around a campfire, a picnic blanket or log can serve the same purpose.
Another fantastic way to save on gear is to borrow from friends or family who are experienced campers or hikers. This can help you try out gear before committing to a purchase. You might also find DIY solutions, like using old containers for food storage instead of specialized backpacking canisters. By being mindful and resourceful, visiting Yosemite National Park on a budget becomes a much more attainable goal for your family.
- Grand Canyon Family National Park Budget
- Zion National Park Family Budget Travel
- Family Vacation Guide to Zion National Park
- Yellowstone Family National Park Guide
- Family Vacation Adventures in Grand Canyon
- Grand Canyon Family Gateway Towns
- Zion Family Gateway Towns
- Best Family-Friendly Hikes in Grand Canyon National Park
- Best Hiking Shoes for Kids
- Best Kids Waterproof Trail Shoes
- Wikivoyage page on Yosemite National Park
Plan a trip your kids will actually enjoy.
Answer a few quick questions and get a free, personalized itinerary tailored to your destination and your children’s ages. No account required — your custom plan is ready in moments.
Filter out the noise and find what works for your family.
Every resort we review gets one of four Family Fit ratings. The rating is based on kids programming, amenities, vibe, and who the resort actually markets to - not just whether they allow children.
Discover My Ideal Resort →